• Discover equipment by island

Where to find hidden equipment

Choose the island where you are missing equipment, then open the map link on the item. All 34 entries include pickup directions and identify any puzzle, cave entrance or underground layer you need.

Updated 2026-11-069 locations · 34 items

Check the item name, layer and landmark

In the map’s collection checklist, select Hidden Equipment. Choose your island and item. The gold ring marks the target.

Look for the listed anchor, candleholder or other landmark. Solve any puzzle or enter the correct cave first. Mark the pickup on the map to save it in this browser. To switch devices, export your progress in the point filter and import it on the other device.

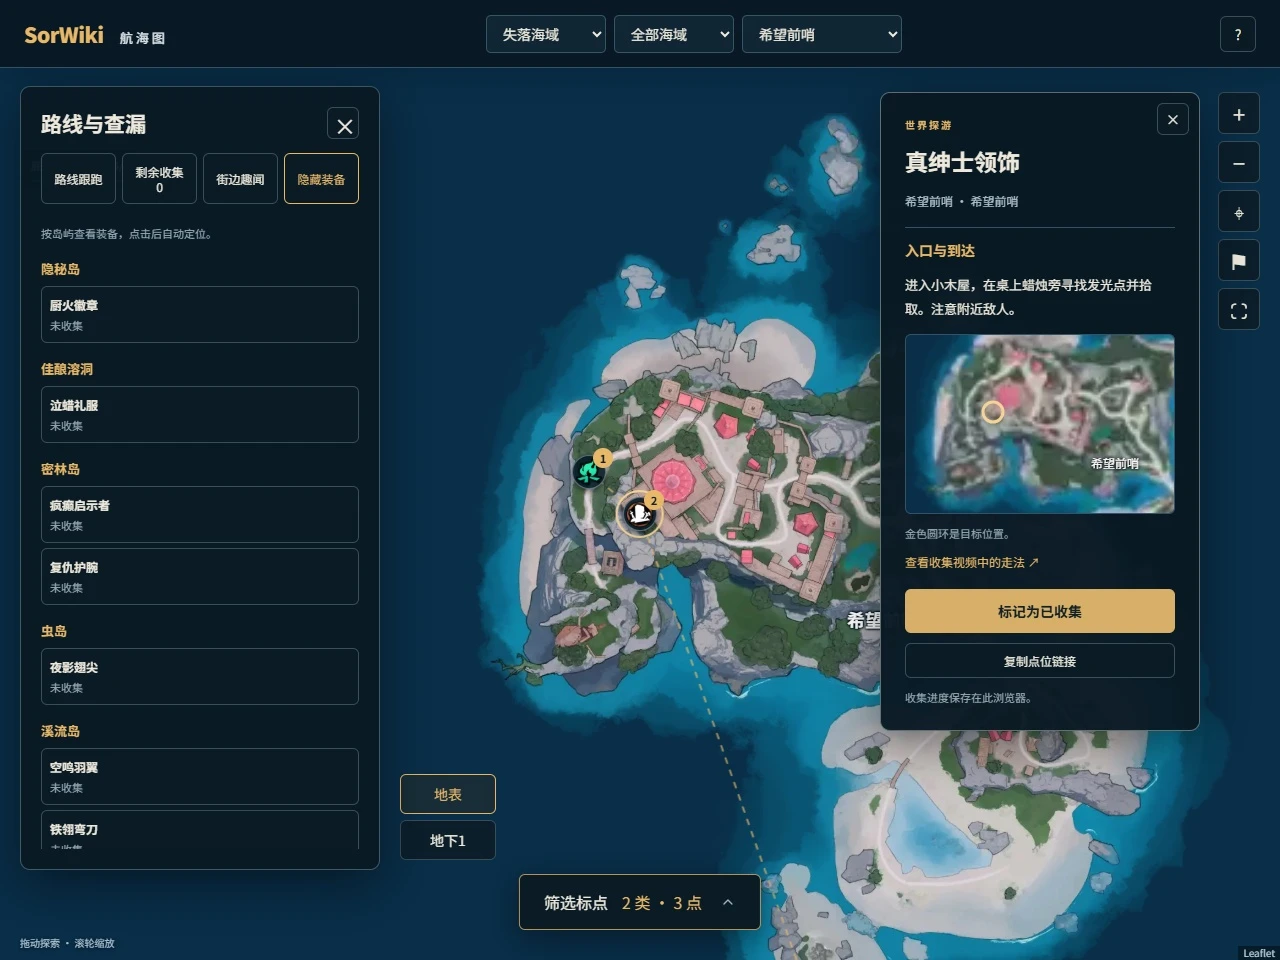
Hope Outpost map with the hidden equipment target circled in gold
The actual page of the SorWiki map. Gold circle marks the target; numbers and dotted lines indicate the order of identification and still need to follow the path that is accessible when passing through the rock walls, buildings or caves.

2 items

Hope Outpost

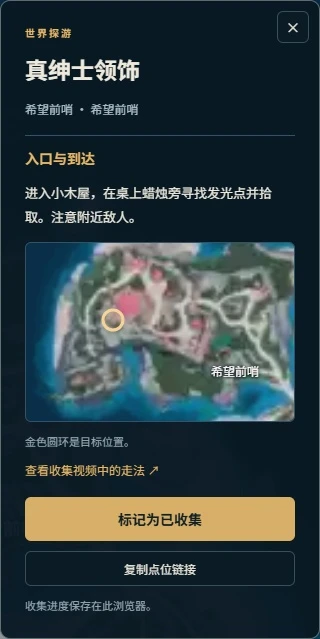
True Gentleman’s Cravat

Location: Hope Outpost, beside the candle on the cabin table.

Map layer — Ground

  1. From the Hope Outpost campfire, enter the nearby cabin.
  2. Pick up the glow beside the candle on the table.

Watch for enemies outside the cabin.

Route video — Station B. Sea of Remnants Guides

Apprentice Dagger

Location: Hope Outpost shore, beside an anchor.

Map layer — Ground

  1. Follow the map marker to the shore and find the anchor.
  2. Pick up the glow beside it.

Route video — Station B. Sea of Remnants Guides

True Gentleman's Cravat Details: Hope Outpost
Details of the SorWiki map: check the cabin and the candles on the table before looking for the next luminous spot.

1 items

Welcome Coast

Key Bracers

Location: Welcome Coast, Joyful Village, beside the plank wall on the wooden platform.

Map layer — Ground

  1. Follow the wooden platform into Joyful Village.
  2. Pick up the glow on the candleholder beside the plank wall.

Route video — Bilibili · Nage Xiaofeilong

8 items

Bridge Crossing Island

This group is located in the docks, water by the edges, buildings and caves.Oath Binding Ring is located on the first basement level; Thunderous Vision, Raucous Fishered Hat and Batshadow Boots first have to find the corresponding entrances.

Fanged Whirlwind

Location: Bridge Crossing Island, on the reef opposite Delicacy Pier.

Map layer — Ground

  1. Walk from the campfire near Delicacy Pier to the dock.
  2. Use the winch lever to lower the boat and cross to the reef.
  3. Pick up the glow beside the anchor.

Route video — Bilibili · Kaikaiya1858

Waiting Crow Earrings

Location: Bridge Crossing Island, at the large snapping flower.

Map layer — Ground

  1. Find the flower near the marker and interact to retract the vines.
  2. Use the nearby flower item to shoot into its open mouth.
  3. Pick up the equipment where it falls.

Start with the flower interaction at this marker.

Route video — Station B. Sea of Remnants Guides

Undying Surge

Location: Bridge Crossing Island, on the rock platform across the water.

Map layer — Ground

  1. Head to the water near the marker and cross the wooden bridge.
  2. Use the lily pads to reach the opposite rock platform.
  3. Pick up the item beside the anchor.

Route video — Bilibili · Kaikaiya1858

Thunderous Visage

Location: Bridge Crossing Island, in the cave by the waterfall at the end of the right passage.

Map layer — Above Ground Level 1

  1. Break the rock blocking the cave entrance.
  2. Take the right passage to the waterfall.
  3. Pick up the item beside the anchor.

Enter through the breakable rock to reach the cave.

Route video — Bilibili · Kaikaiya1858

Raucous Feathered Hat

Location: Bridge Crossing Island, in the cave beside the large coastal tree.

Map layer — Above Ground Level 1

  1. Follow the coastal cliff to the tree and enter the cave.
  2. Solve the statue and floor-grid puzzle to open the path.
  3. Find the glowing object outside the room on the other side and collect it.

Use the route video to match the statue and tile positions.

Route video — Bilibili · Bai Fangkuai Wai Q

Feast Necklace

Location: Bridge Crossing Island, by the building near the Sea Eagle Iron Guard.

Map layer — Ground

  1. Head to the area near the guard.
  2. Find the candles and flowerpots beside the building.
  3. Pick up the glow on the candle.

Route video — 4399 . . . . . . . . . . . . . . . . . . . . . . . . . . . . . . . . .

Batshadow Boots

Location: Bridge Crossing Island, inside a building, beside the chest.

Map layer — Ground

  1. Use the map marker to find and enter the building.
  2. Follow the stone slabs to the chest.
  3. Collect the item on the candleholder beside it.

Route video — Bilibili · Nage Xiaofeilong

Oath Binding Ring

Location: Bridge Crossing Island, Underground Level 1, on the high ledge at the end of the passage.

Map layer — Underground Level 1

  1. Start at the campfire on the right of Underground Level 1.
  2. Turn left into the passage and jump onto the cage on the right to reach the ledge.
  3. Pick up the item beside the anchor at the far end.

If you are on the surface, enter the underground level before looking for the passage.

Route video — Bilibili · Hanyac

15 items

Statue Island

Statue Island, which is far away, selects the vicinity of Campfire according to the equipment it lacks. Cocoon of Time, Silent Years, Debt Collector's Bone Pendant and Trembling Incect Wings involve resonance and do not have to run from the top in order of the list.

Iron Wall Medal

Location: Statue Island coast, at the base of the cliff near the water.

Map layer — Ground

  1. Go to the marked stretch of coast.
  2. Follow the beach to the base of the cliff and collect the glow near the water.

Route video — Bilibili · Nage Xiaofeilong

Broken String Bracelet

Location: Statue Island woodland, beside the anchor near a chest and enemies.

Map layer — Ground

  1. Go to the marked spot in the woods.
  2. Find the anchor near the chest and enemies, then collect the glow beside it.

Route video — Bilibili · Nage Xiaofeilong

Face of Pain

Location: Statue Island, on the grass above the coastal cliff.

Map layer — Ground

  1. Find the ladder in the coastal cliff and climb it.
  2. Cross to the grass overlooking the sea and find the anchor.
  3. Collect the item beside it.

Route video — Bilibili · Nage Xiaofeilong

Splendid Porcelain Carving

Location: Statue Island wooden camp, beside a candleholder on the raised walkway.

Map layer — Ground

  1. Find the marked wooden camp.
  2. Take the raised boardwalk to the candleholder.
  3. Collect the glow beside it.

Use the raised walkway here. The two-plant vine route belongs to Cocoon of Time.

Route video — Bilibili · Nage Xiaofeilong

Robe of Shelter

Location: Statue Island, on the path between the waterfront cliffs.

Map layer — Ground

  1. Follow the water to the path between the cliffs.
  2. Find the candleholder by the plank wall.
  3. Collect the glow on it.

Route video — Bilibili · Nage Xiaofeilong

Lion’s Prison

Location: Statue Island, on the wooden platform beside the tall scaffold.

Map layer — Ground

  1. Find the slingshot beside the scaffold.
  2. Use it to reach the wooden platform.
  3. Collect the glow on the platform.

Route video — Bilibili · Guyue Fangyuan

Cocoon of Time

Location: Statue Island, on a ledge reached by vines.

Map layer — Ground

  1. Find the two plants connected to the resonance stone and interact with them.
  2. Trigger Memory Resonance to reveal the vine path.
  3. Climb the vines and collect the item by the anchor.

If you can see the ledge from below, return to the resonance stone and complete the vine path.

Route video — Bilibili · Longxia

Soothed Obsession

Location: Statue Island, on high ground by the river.

Map layer — Ground

  1. Take the road to the river from the marker.
  2. Follow the bank to the marked high ground.
  3. Collect the glow.

Route video — Bilibili · Xiao Jimao Dandan
Silent Years

Location: Statue Island, on top of the glowing purple pillar.

Map layer — Ground

  1. Find the glowing pillar near the marker.
  2. Trigger Memory Resonance.
  3. Use the bouncing mushrooms to reach the top and collect the item.

Route video — Bilibili · Xiao Jimao Dandan
Mycelium Hymn

Location: Statue Island, above the stone wall near a large tree.

Map layer — Ground

  1. Follow the stone wall uphill from the marker.
  2. Find the high ground near the large tree.
  3. Collect the glow.

Route video — Bilibili · Xiao Jimao Dandan
Debt Collector’s Bone Pendant

Location: Statue Island, in the high alcove behind a house.

Map layer — Ground

  1. Go behind the house and activate the resonance stone.
  2. Climb the boards and steps that appear.
  3. Enter the rock alcove and collect the glow.

Route video — Bilibili · Xiao Jimao Dandan

Trembling Insect Wings

Location: Statue Island, on the far bank near the waterfall.

Map layer — Ground

  1. Activate the resonance stone near the waterfall to open the vine path.
  2. Use lily pads and branches to cross the river.
  3. Collect the item by the cliff wall.

Route video — Bilibili · Xiao Jimao Dandan

Moment of Dread

Location: Statue Island, inside a cave blocked by rocks.

Map layer — Ground

  1. Follow the map marker to the blocked cave.
  2. Break the rocks and enter.
  3. Collect the glow inside.

Route video — Bilibili · Xiao Jimao Dandan

Forest Spirit’s Will

Location: Statue Island, above the ship on the coast.

Map layer — Ground

  1. Trigger the flower and branch mechanism near the coastal ship.
  2. Cross along the branches.
  3. Bounce on the mushrooms to reach the item.

Route video — Bilibili · Xiao Jimao Dandan

2 items

Jungle Island

Frantic Revelator

Location: Jungle Island, inside the wooden structure on the cliff.

Map layer — Ground

  1. From the Jungle Island campfire, head to the marked cliff.
  2. Follow the dead branches into the wooden structure.
  3. Collect the glow inside.

Route video — Bilibili · Xiao Jimao Dandan

Vengeance Bracers

Location: Jungle Island, above Shipwreck Ruins beside dead branches and purple flowers.

Map layer — Ground

  1. Start at the campfire near Shipwreck Ruins.
  2. Climb the rocks to the ledge.
  3. Collect the glow by the dead branches and flowers.

Route video — Bilibili · Daye Gameplay

3 items

Stream Island

Hollow-Sounding Wings

Location: Stream Island, on a stone slab in the river.

Map layer — Ground

  1. From the Stream Island campfire, follow the path through the opening.
  2. Step onto the slab in the middle of the river.
  3. Collect the glow on it.

Route video — Bilibili · Xiao Jimao Dandan

Ironfeather Scimitar

Location: Stream Island, on the reef beside the wrecked ship.

Map layer — Ground

  1. Follow the beach to the wreck.
  2. Use the floating planks to reach the reef.
  3. Collect the glow beside the chest.

Route video — Bilibili · Daye Gameplay

Dark Corrosion Necklace

Location: Stream Island, in the cellar near the Mouse Puzzle.

Map layer — Ground

  1. Enter the cellar by the Mouse Puzzle.
  2. Solve the rotating-disc lock on the door.
  3. Enter and collect the item by the chest and candleholder.

Use the surface marker to find the cellar entrance.

Route video — Bilibili · Nage Xiaofeilong

1 items

Insect Island

Nightshadow Wingtip

Location: Insect Island, on a platform below two shoreline rocks.

Map layer — Ground

  1. Follow the path from the campfire to the coastal rocks and grass.
  2. Jump between the two rocks to the platform below.
  3. Collect the glow.

Route video — Bilibili · Xiao Jimao Dandan

1 items

Fine Wine Grotto

Weeping Wax Gown

Location: Wine Cavern, behind rocks and wooden screens near the wedding site.

Map layer — Above Ground Level 1

  1. Go from the cavern campfire to the wedding site.
  2. Look behind the rocks and wooden screens.
  3. Collect the item at the glow.

The map marks Above Ground Level 1. The item is inside Wine Cavern.

Route video — Bilibili · Nage Xiaofeilong

1 items

Hidden Island

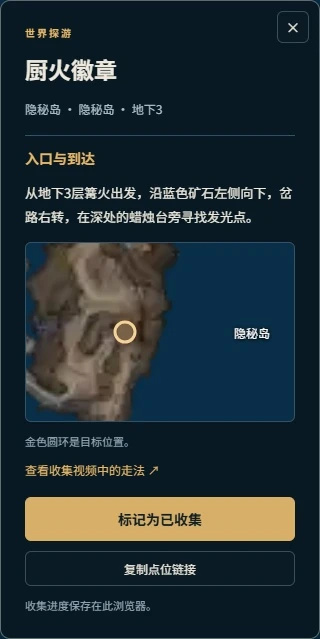
Kitchen Fire Badge

Location: Hidden Island, Underground Level 3, at a candleholder deep in the cave.

Map layer — Underground Level 3

  1. From the Level 3 campfire, descend to the left of the blue ore.
  2. Turn right at the fork and continue deeper.
  3. Collect the glow beside the candleholder.

Open Underground Level 3 before following these directions.

Route video — Bilibili · Hanyac

Kitchen Fire Badge Details: Hidden Island, 3rd basement, left side of the blue ore to the candlestick.
Details of the SorWiki map: The target level of Kitchen Fire Badge is the 3rd basement.

We're near the sign, or we haven't found it?

There's a target up there, but he can't climb up there.

In the case of Cocoon of Time, two plants connected with resonance are treated first, triggering the Memoly Resonance and following the emergence of vines. The Silent Yearbooks, for example, have to empathize and use the trophies to climb the stone column, and the two are not compatible with the same method.

It's in the same place. There's nothing on the floor.

Look first at the hierarchy: Kitchen Fire Badge is on the third basement level in Hidden Island, Oath Binding Ring is on the first basement level in Bridge Crossing Island.

You see a door or a rock in the way.

Dark Corrosion Necklace is going to enter the cellar and complete the disk door locks; Raucous Fishered Hat needs to complete the cave image and squares first.

List shows uncollected but has been taken

The map does not automatically read the backpack. When you have it in the game, you return the map point " Marked as Collected " ; the error point can be clicked again to cancel.

Routes Related

Each piece of equipment is linked to the corresponding live machine route; the sub-P video has sections and time locations on it.

Map screening and detection methods · Hidden Sea collects all of the five islands. · View equipment properties and levels